Headboard Cabinet Build Process
The Cabinet Build
First Meeting at my Studio
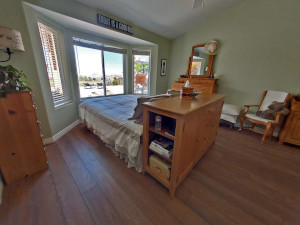
I was contacted by a client that was looking for a headboard cabinet for her bed. The idea was she wanted to be able to place the bed in the middle of the room and position it to face the window. The view of the lake is what she wanted to see each morning. During our discussion the solution was a free-standing cabinet that could be placed in the middle of the room to serve as a headboard for the bed. At the time of her visit, I was working on a sideboard for another client, which she liked, so I incorporated aspects of that design into her project. After a quick sketch and discussion on wood options, color and finish we were ready to start design work.
Design – Every Successful Project Starts with a CAD Drawing
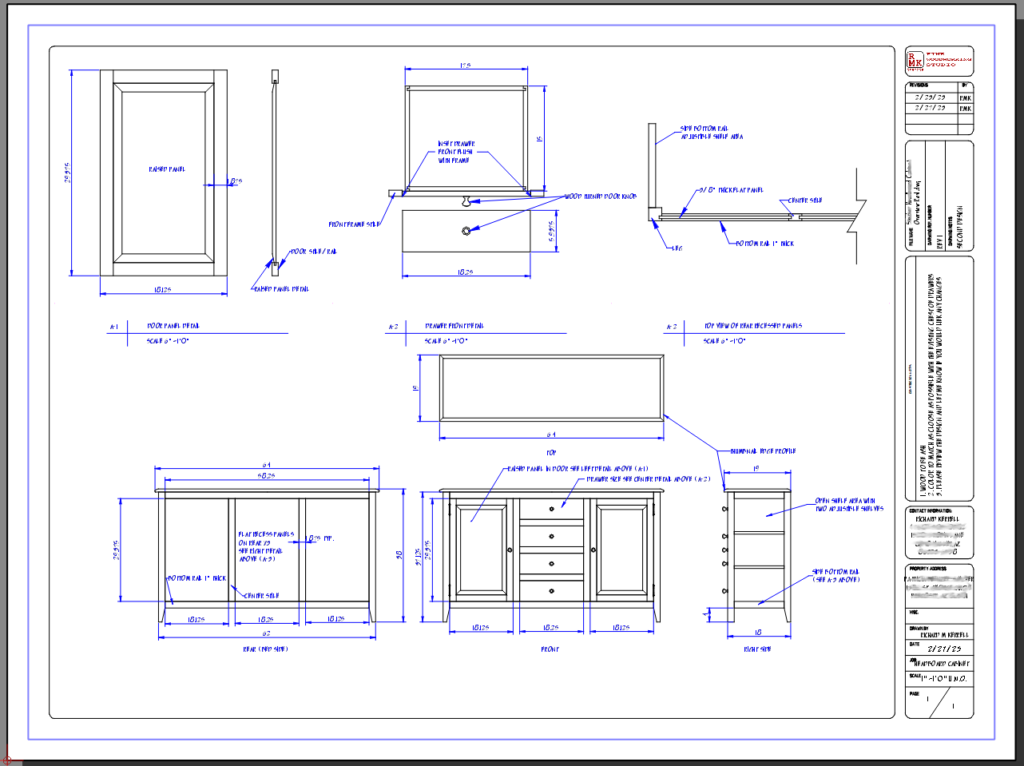
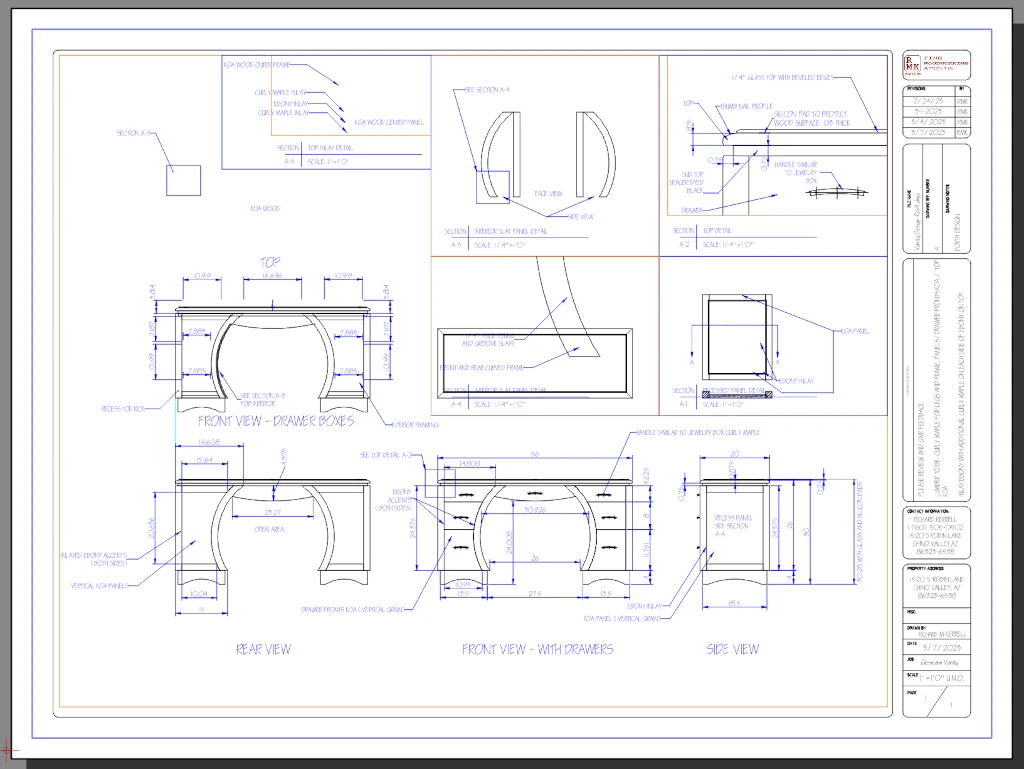
After the initial design consultation, I used my CAD (Computer Aided Design) software to produce a scaled drawing of the front, sides, and top view. This gives the client an idea of proportions and the details that will be incorporated into the piece of furniture. Once the drawing was complete, I emailed it to the client for approval. She replied with a couple minor changes. I made those changes, and the design was approved.
Wood Selection – Personal Selection is Important
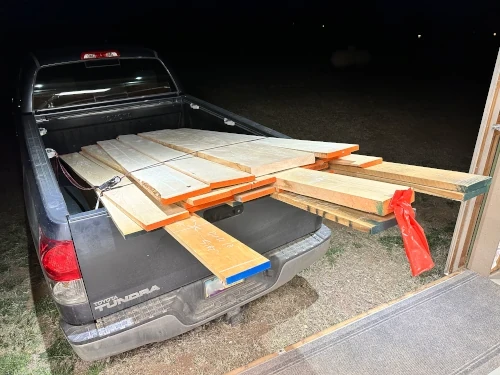
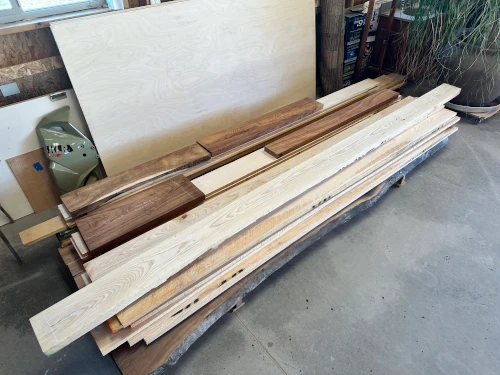
The wood that was requested was Ash. It is a beautiful hardwood that has a similar grain to Oak. One of the aspects that makes my work unique is that I personally pick out every piece of wood for a project, unlike some builders who order wood from the lumber yard sight unseen. This gives me the opportunity to select the best grain and look for any interesting figure that may be present in the lumber. Once the wood is at my studio, I allow it to acclimate for a week before I start cutting.
Time to Handcraft – Attention to Detail is Critical to Custom Furniture
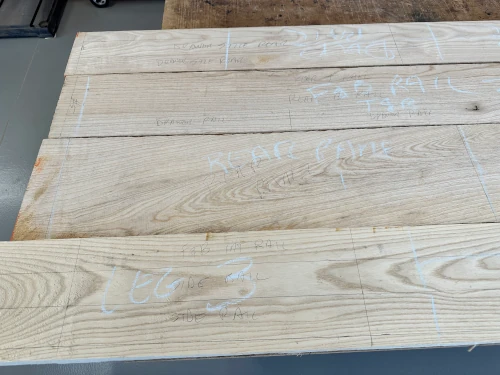
Part Layout on Lumber
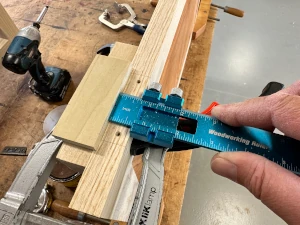
The process of building a piece of furniture starts with laying out the parts on the rough lumber. I use my Cut List (list of the dimensions of the finished parts) to position the parts on the lumber. This makes sure all parts fit the board and I am not wasting wood or running short. Once that process is complete, I roughly cut the lumber oversized and start milling the parts to finished dimensions.
Part Milling
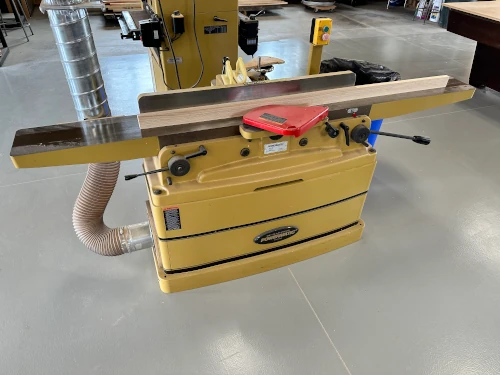
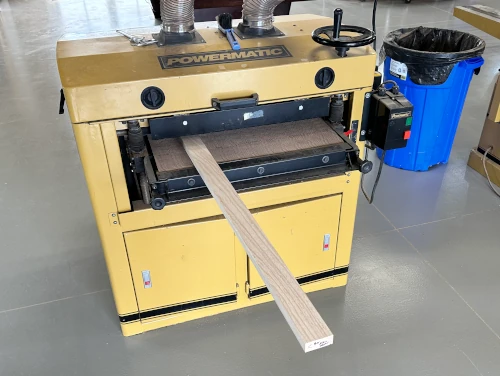
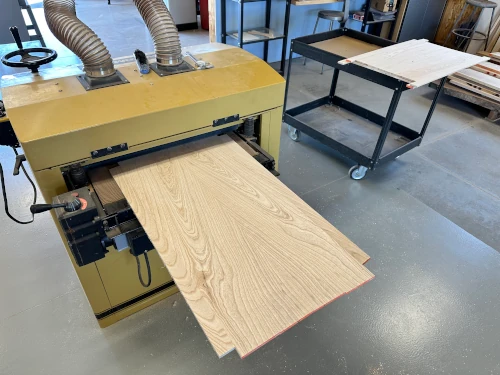
The Drum Sander is used to surface the faces of the parts. This produces a smooth and defect free surface. The Jointer is used to flatten the face of the lumber and make the edge straight. Next, I use the table saw to cut the widths and lengths of the parts.
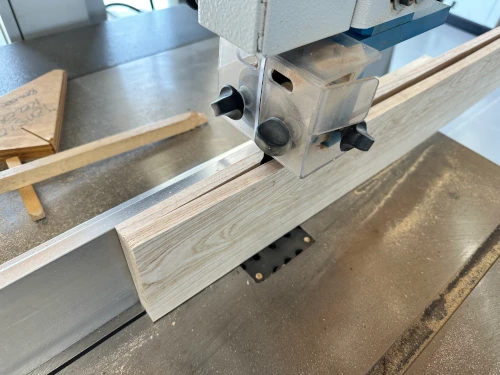
Joinery
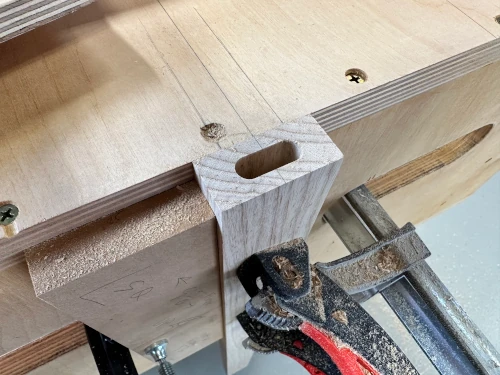
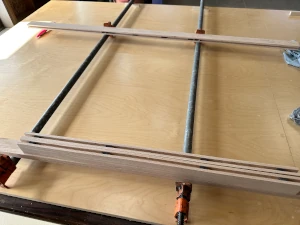
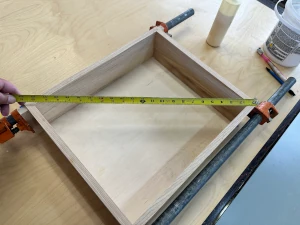
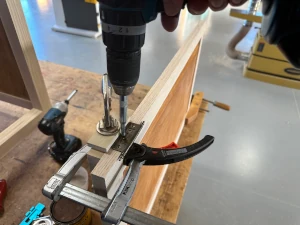
After the parts are dimensioned, I start making the front and rear frames. These are where the doors and drawers will be as well as the rear panels. The first step is joinery which in this case is loose mortise and tenon. This type of joinery consists of cutting a mortise pocket into two mating sections and using a tenon that has been cut and shaped to fit the mortise and is used to attach the two pieces. It is an incredibly strong way to join wood. After all the joints are cut and fit, I assemble the front frame. I will need to wait on the rear until the panels are finished.
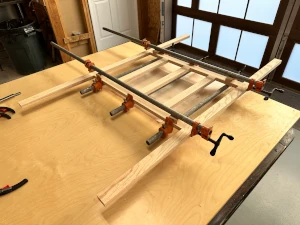
The next step is crafting the panels that will become the rear of the cabinet. Since these will be seen on the rear of the cabinet (the side the bed goes on) I chose to use Solid Ash wood Panels. This meant I need to resaw (slice the wood thin) to create the stock for the panels and glue them edge to edge. Once the glue has dried the panels are surfaced using the Drum Sander. They are then cut to size, fine sanded and stained. I also apply a clear finish to all panels prior to assembly in the rear frame. This is necessary to ensure all the wood is sealed so temperature and humidity changes in the future do not cause the wood to crack.
Assembly
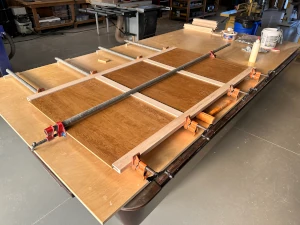
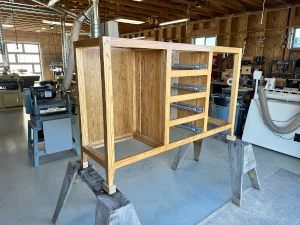
Assembly starts with fine sanding of the interior parts which makes the final sanding process easier and produces a much better finish. I work on each section separately starting with the front panel. Once it is glued up, I move to the leg sections on each side of the cabinet and then the rear panel. The next step is the center section which connects the front and rear. Once cured I glue the legs on each end of the cabinet. Doing it this way reduces my stress since glue cures rapidly especially when it is warm.
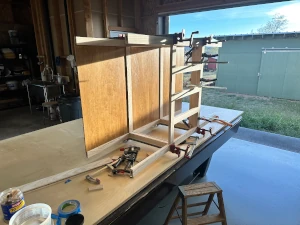
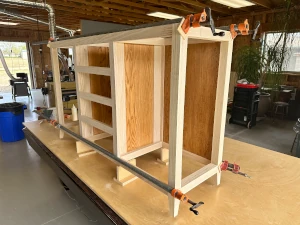
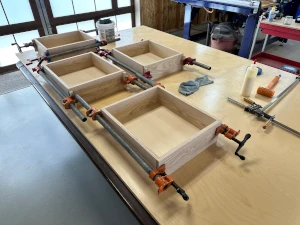
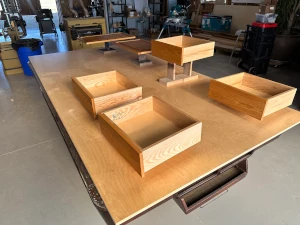
Drawer Build
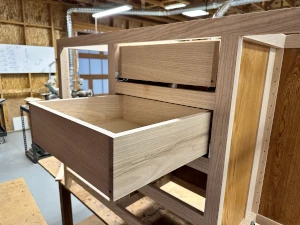
Now that the cabinet is assembled, I can work on the drawers. They start with milling the lumber to size. I use a Rabbit Dado joint. This joint consists of cutting a dado in each end of the drawer side set in the thickness of the drawer material and a rabbit on each end of the front and back. Once those are complete, I can cut a groove into the bottom inside edge of the drawer for the Baltic Birch drawer bottom. Next is sanding all the interior parts and assembly. I added my logo to the inside of the top drawer to brand the project I built.
Door Construction
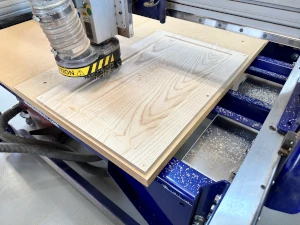
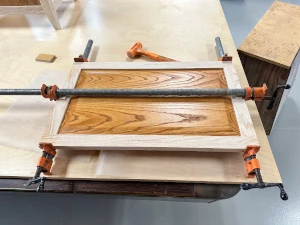
I then moved on to the door. It all starts with milling and joining lumber for the door panel. Since this is a raised panel door, I use my ShopBot CNC to shape the panel and cut it to size. This produces a part that will fit in the door frame accurately. After the panel is made, I can construct the door frame. It too starts with milling the wood to size and cutting a groove along the inside edge for the raised panel to fit. After the mortise and tenon are cut I can assemble the door and once cured it will be ready to cut to size to fit the cabinet opening.
Fitting all parts
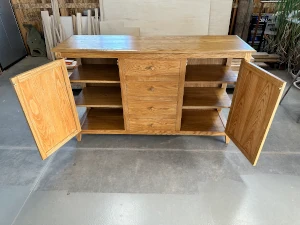
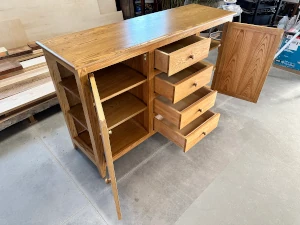
The next phase after all the elements for the cabinet are complete is to install them in the cabinet. In this case that means doors and drawers. I installed all the drawer slides making sure the height adjustments are set in the middle for all settings. This ensures that I will have ample room to fine tune the fit. In this case the drawer slides fit properly. I then was able to mill and fit the drawer fronts and attach them to the drawer boxes.
The doors are next. I started by attaching the hinge to the door and then aligning them to the cabinet and screwing in place. All the doors fit well with some slight cutting for width and height. I typically make the doors the exact size of the opening, giving me a sixteenth of an inch on all sides to trim off for a perfect fit.

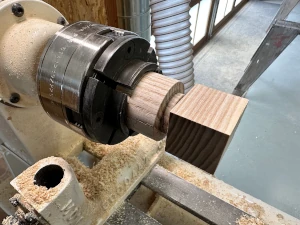
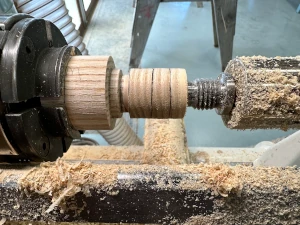
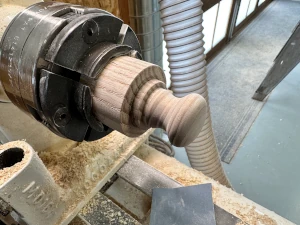
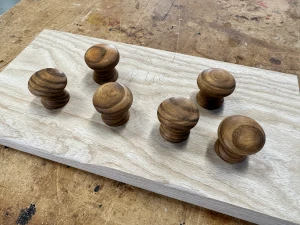
Turning the Knobs
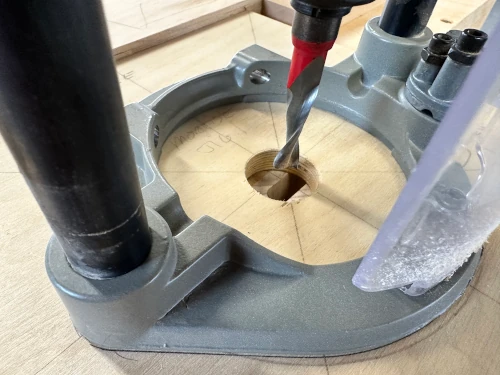
Typically, I use purchased knobs for my furniture, but the client requested knobs that match their existing furniture, so I turned them using the same Ash wood as the cabinet. I installed threaded inserts into the wood with the same screw size as most metal knobs so they could be changed in the future without any modifications to the cabinet. They came out very well and look great on the cabinet.
Sanding and Inspecting
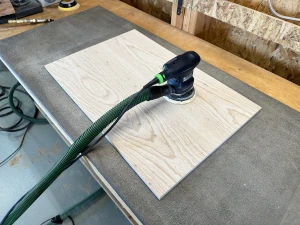
The next process is to fine sand all parts as well as the carcass of the cabinet. As I was building each section, I sanded the wood to 120 grit. All I needed to do was fine sand the wood with 200 grit for a scratch free surface. I used a bright light at an angle to check the surface for any remailing scratches or imperfections. When this process is completed, I will be ready to stain and finish.
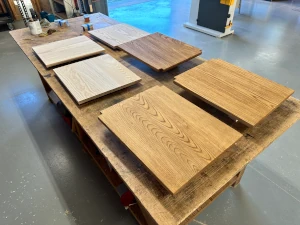
Staining and Finish
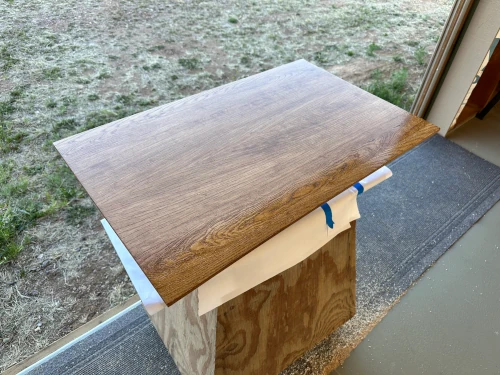
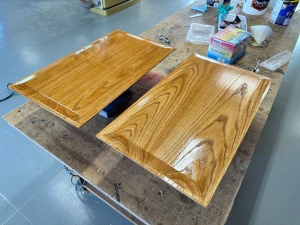
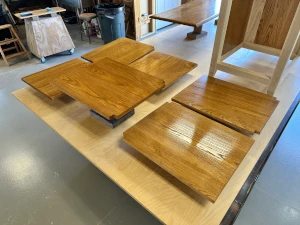
After blowing all the dust off with compress air and wiping down all surfaces I am ready to apply stain. The surface of the wood is wiped with rags drenched with stain. After the stain is dried, I can then spray the Pre-Cat Lacquer. This is a durable wood coating that provides protection from moisture, chemicals, and dirt. This process involves using an air powered spray gun that atomizes the liquid coating and applies a smooth layer on the wood. After the finish cures, I can sand with 320 grit sandpaper and apply a second coat. This process ensures a smooth durable finish.

Final Assembly – Completion
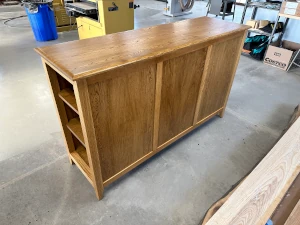
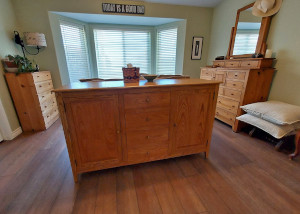
After the finish cures completely for a couple of days I can assemble the doors and drawers. Since all parts were already assembled this is just a reattachment process. The top is also attached to the cabinet during this phase. The headboard cabinet is now complete and ready for delivery.

Delivery
I wrap the project in a moving pad and load it in the bed of my truck for delivery to the client. Once at the client’s house we carry the item in and place it into the location as instructed by the client. Wipe down the cabinet to remove any dust that may have landed on the wood surface.
Conclusion
This has been another enjoyable project to handcraft. The Ash wood used had a great grain pattern and the color of the stain added a warm tone. I hope you have enjoyed watching the process of this build. If you have any questions or would like to inquire about a custom piece of your own, please contact us.
This is a beautiful cabinet, and the build quality looks great. Do you craft larger projects like dining room tables or China cabinets?